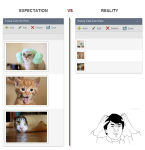
A proper UI design for any web application is a must. This is something I would always put as one of my top priorities. I could never face a user with an ugly user interface.
Creating a pleasant-looking and user-friendly website is as important as creating a comfortable home. You would always want to be in it, because it’s comfortable to be in it. Having good UI drives user adaption for your web applications, therefore making sure your users actually use your K2 applications happily. (therefore maximizing your investment).
Having a drag-and-drop UI designer is much like designing your new home: you can plug and play pre-made Ikea furniture, or you could ask a contractor to customize some stuff for you. But here, I will explain how you could do a hybrid of both. Now, let’s get to the point…
K2 Smartforms is great because while you have drag-and-drop for out-of-the-box functionality, you also have some levels of flexibility:
- Insert HTML / Javascript / CSS into SmartForms (this is what this post is about)
- Create your own custom controls (I will probably talk more about this in a future post).
Tip#1:
To easily insert HTML literals into a SmartForm, it is highly recommended to install Adam Castle’s HTML Literal custom control. Otherwise, you can use a Data Label as a Literal, and then use expressions for dynamic values. (more details here)Tip#2:
If an HTML snippet is frequently used, you can save it as an Environment Library variable. (more details here)
Below is an auto-compiled list of my posts with the tag “UI Hacks”. These are some of my favorite tricks to make my K2 Smartforms look better.
 Easily add (*) to required field labels [K2 Smartforms] - Easily append * to all required field labels in K2 SmartForms
 Form Progress Steps custom control - A custom control to dynamically render a progress bar into your K2 Smartform. It can even auto-populate its values dynamically from a specified workflow.
  Adding Progress Bars into K2 SmartForms - Adding cool progress bars in SmartForms. Useful for keeping track of workflow progress / micro-managing. 😉
 [K2 Workdesk Smartstarter] Collapsible side menu & scrollbar - How to make the K2 Workdesk left menu collapsible, and add a scrollbar for a long list of links.
![]() Reuse 1 ListView for both editable and read-only K2 SmartForms - This HTML snippets helps you save time by reusing your editable List View into your Read-only page by hiding add/edit/delete toolbars.
Very very useful for quickly churning out apps!
Reuse 1 ListView for both editable and read-only K2 SmartForms - This HTML snippets helps you save time by reusing your editable List View into your Read-only page by hiding add/edit/delete toolbars.
Very very useful for quickly churning out apps!![]() Preview a SharePoint document into K2 Smartforms - Inserting a SharePoint document into a SmartForm.
Preview a SharePoint document into K2 Smartforms - Inserting a SharePoint document into a SmartForm.![]() Transform tabs into multi-step buttons - Transform K2 Smartform tabs into progress buttons
Transform tabs into multi-step buttons - Transform K2 Smartform tabs into progress buttons ![]() Re-style tabs for Lithium Theme - Add borders to the Lithium theme's tabs
Re-style tabs for Lithium Theme - Add borders to the Lithium theme's tabs![]() Moving Views on top of tabs & removing background color - K2 Designer does not allow you to drop views above tabs. This hack shows you how.
Moving Views on top of tabs & removing background color - K2 Designer does not allow you to drop views above tabs. This hack shows you how. Displaying higher-resolution images in a List View - So you have a list of image attachments, and you want to display these images inline into your SmartForm. But K2's ListView only displays a tiny thumbnail of your image.

Nice.
Thxs Riva for these tips
LikeLike
you are welcome, Jean! Hope you will find them useful.
LikeLike
Very nice one Riva
LikeLike
Thanks, Hanif!
LikeLike
Hi, this is great, thanks! Do you have a tip how to remove the title bar on the lithium form? I just want it to look like the Incidient Logging view you have in your example at the top of this page.
LikeLike